Stippling Technique
Stippling is a technique in drawing used for shading pictures. In this technique, dots are used in various ways to create dark and light effect in a drawing. The dots used to shade a picture can be many or few, big or small, dark or light. They can also be far apart or close together. When many dots are made close together, they create a dark effect. To create a light effect, few dots placed far apart are used.
Activity 1
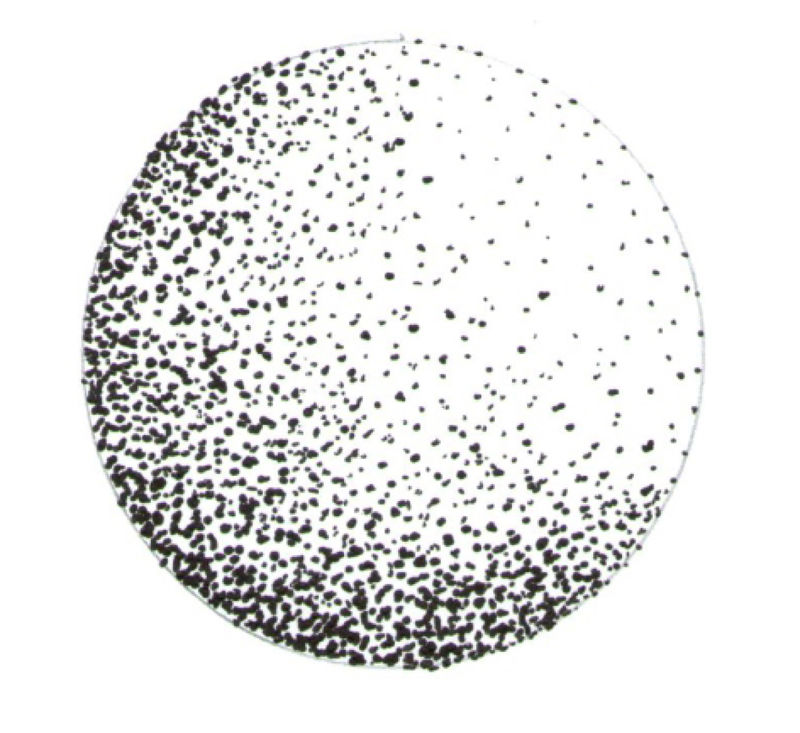
Study the drawing given below.
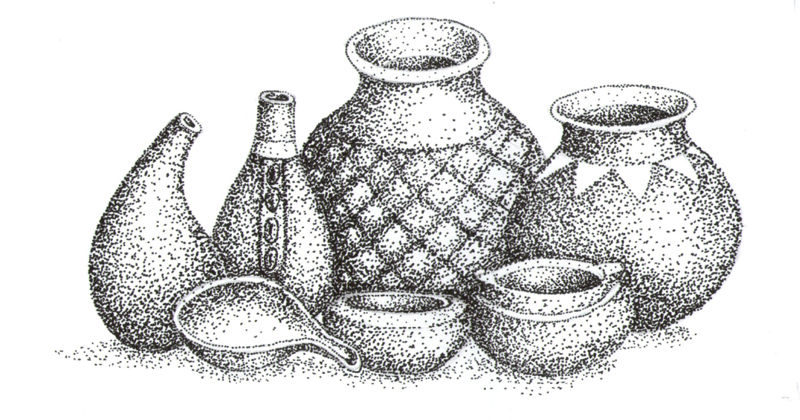
- Why do some parts in the drawing appear light and others dark?
- How are the dark and light parts created in the picture?
Creating dark and light effects in a drawing
When you observe an object, the surfaces near the source of light appear light while the areas far from light appear darker. This light and dark effect in a drawing is shown by shading. The shading can be done using various techniques. Some of these techniques are: smudging, cross hatching and stippling. The smudge technique is achieved by rubbing a pencil, crayon or charcoal on a surface. Cross hatching is done by using lines and stippling is achieved by using dots.
Activity 2
To remind yourself of what you learnt in Grade Four and Five, study the table below then say how light and dark effects are created in a drawing.
a) Smudging | 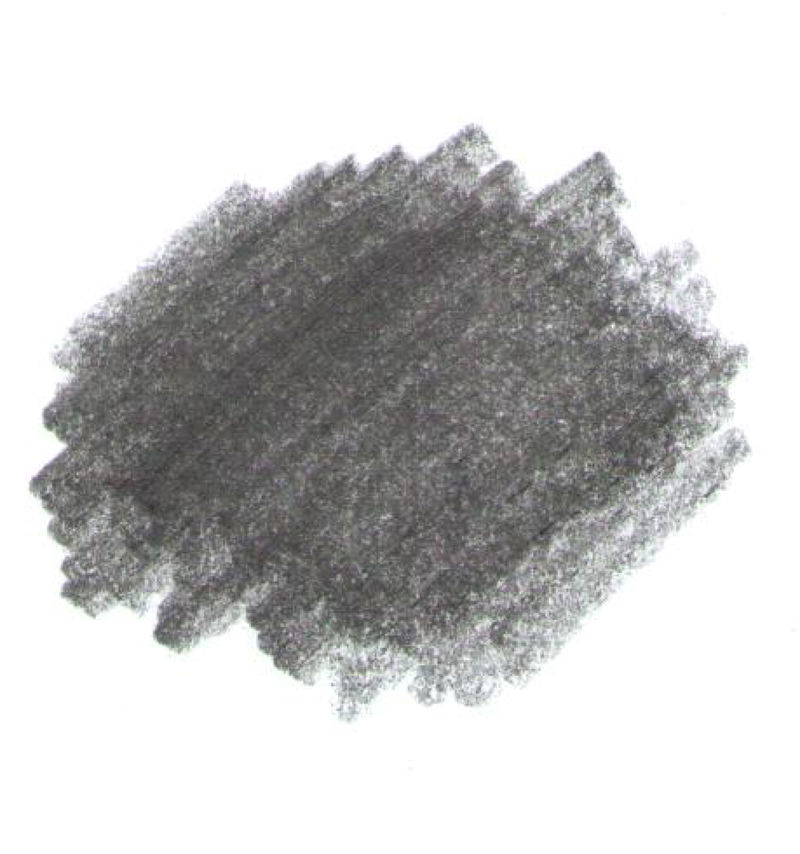 | 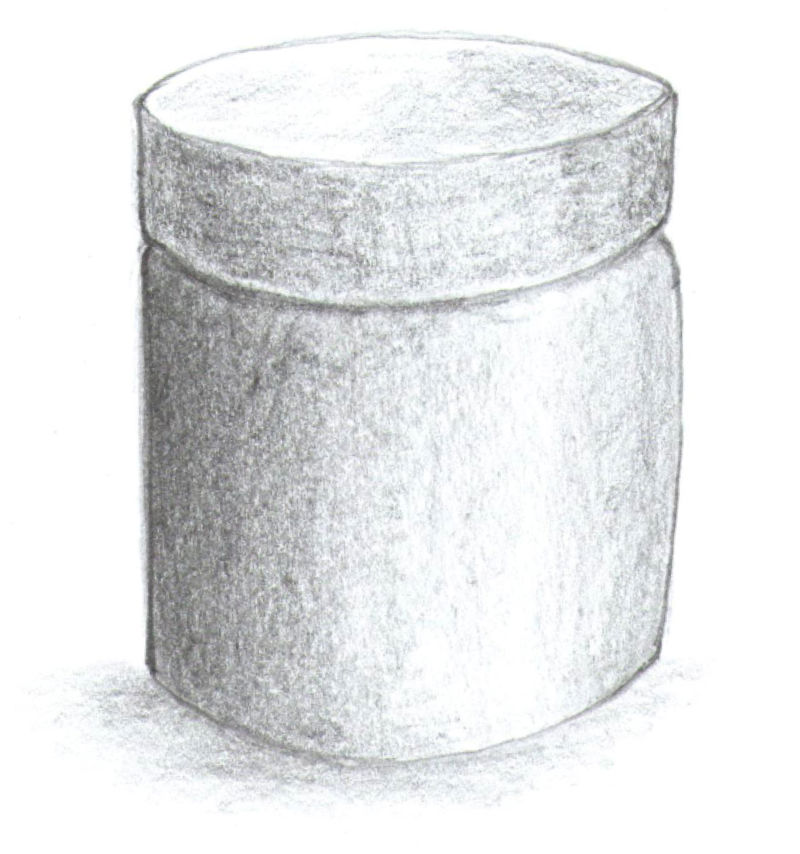 |
b) Cross hatching | 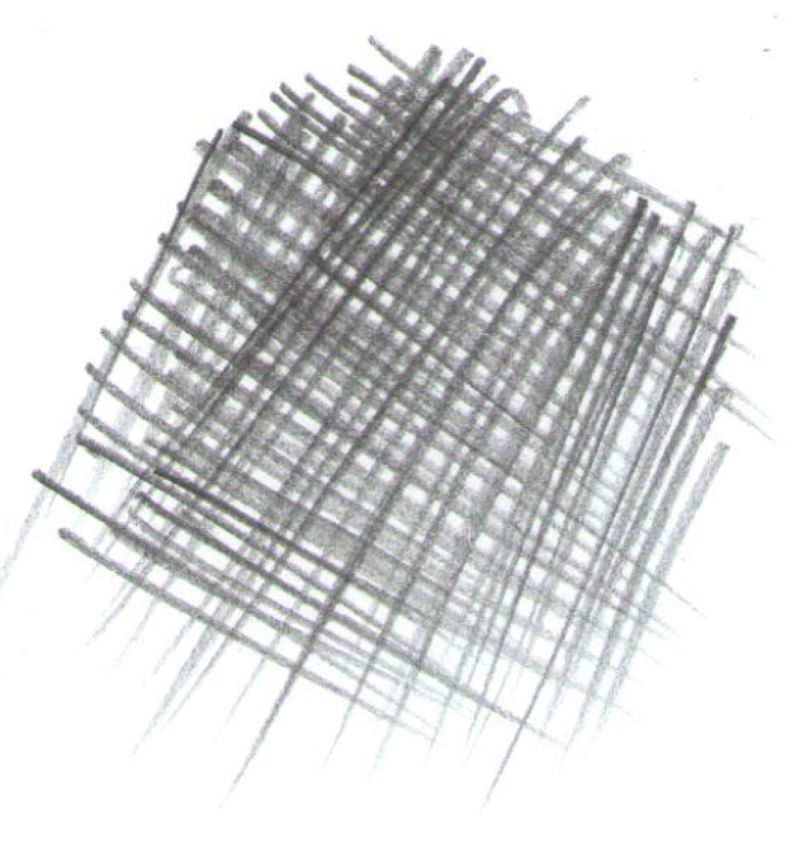 | 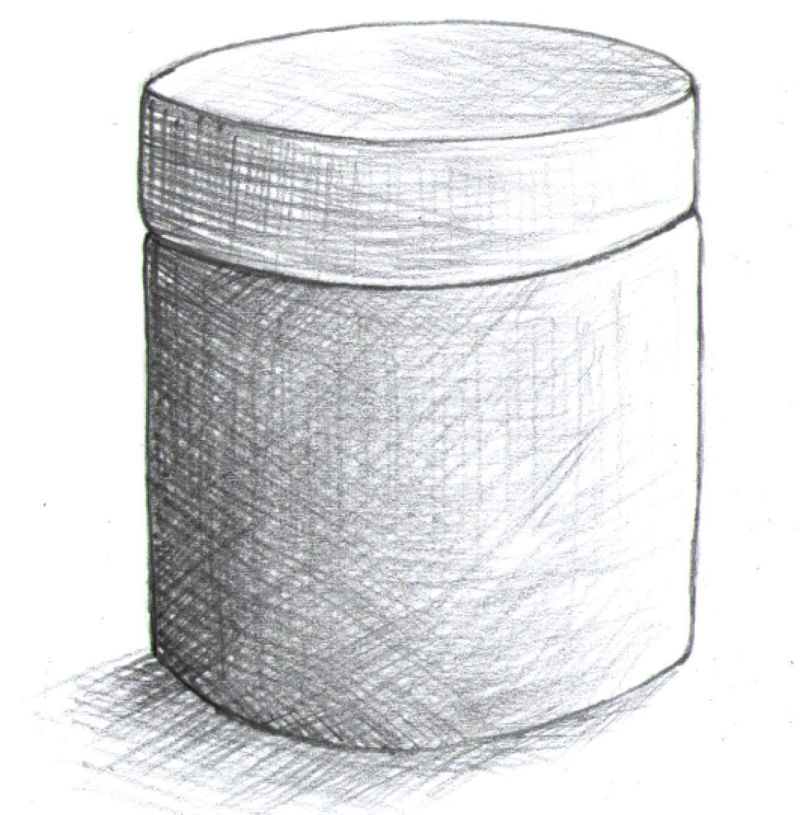 |
Shading techniques
Digital Time
In groups, search from a digital device for pictures shaded using stippling technique. Use key words such as shading techniques and stippling. You can also watch a video on how to shade using stippling technique.
- What pictures have you identified from the digital devices?
- How is shading achieved in the pictures?
Creating dark and light effect using stippling technique
When shading a drawing using the stippling technique, the light and dark effects are created by how far apart or close together the dots are. The shading can be created to appear to change gradually or abruptly depending on the effect to be achieved.
Materials and Tools
- Papers
- Pencil
- Biro pen
- Sharpener or razor blade
- Rubber
- Ruler
Activity 3
Practise creating dark and light effects using the stippling technique.
Follow the steps given.
- Draw a rectangular strip then divide it into three sections.
- Use many dots close together to shade the first section. In the middle section, shade using fewer dots spread far apart then in the third use few dots sparsely spaced. An example is shown below.
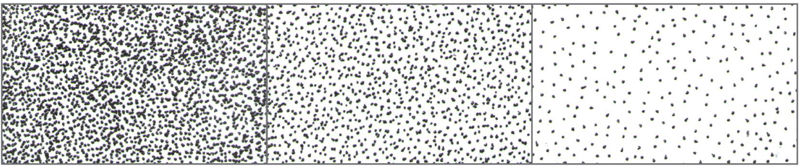
- What effect do you see in the drawing with dots close together?
- What effect is created in the drawing with the dots far apart?
Activity 4
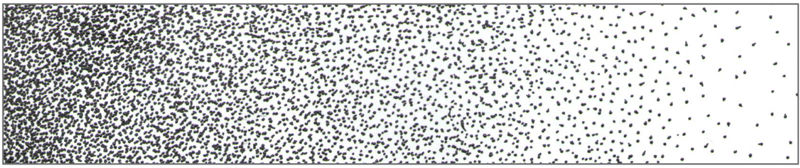
Practise gradual change from dark to light effect using the stippling technique.
- Draw a rectangular strip.
- Shade the rectangular strip from dark to light using stippling technique. An example is shown below.
Activity 5
Practise creating shading forms using the stippling technique. Follow the steps provided.
- Draw a shape of your choice.
- Use stippling technique to shade the shape. Vary the dots to create gradual change from dark to light. Some examples are shown.
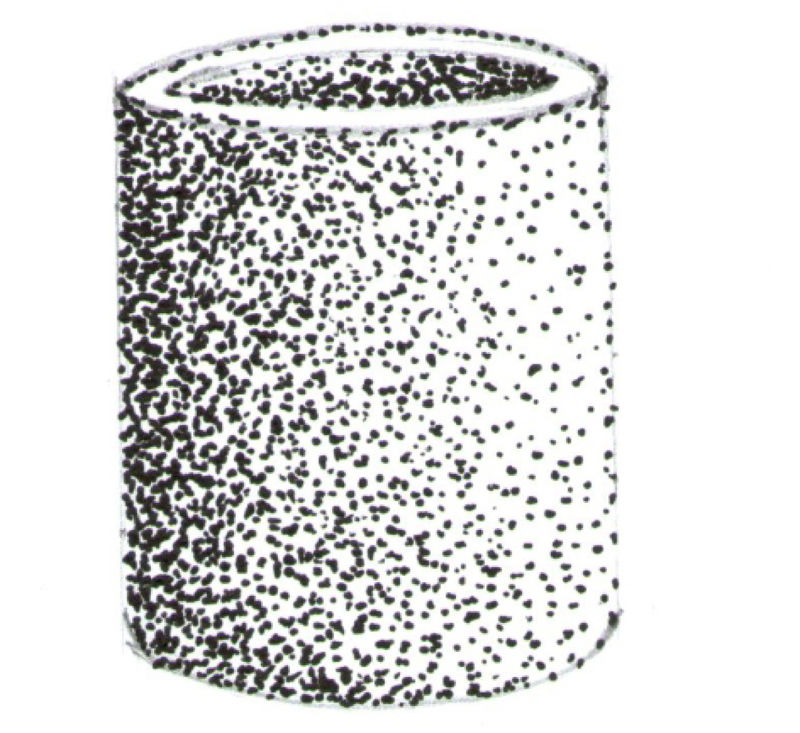
Shading using stippling technique
Drawing an imaginative composition
An imaginative composition drawing is created by thinking of new ideas, forms and images then drawing them. When drawing the composition, first take time to think of how to arrange the images within the working area. Sketch what you have thought out. Rearrange and adjust the drawing until it looks very pleasing to you for a final drawing. Use stippling technique to shade the composition to create light and dark effect on the drawing. You will need to take your time when shading using the stippling technique. Do not rush just to finish quickly. As you work, make sure your work looks attractive.
When drawing an imaginative composition, you need to be aware of balance of forms, proportion of forms and textural effects. Each one of these is explained below.
Balance of forms
Balance of forms in a composition can be created when the visual weight of the forms drawn are well distributed in the composition. The forms should not be crowded on one side of the paper. The left and right part of the composition should be seen to have the same visual weight. An example of balance in a composition is shown below.
- How has balance of forms been achieved in the composition?
- Why is balance of forms important in a composition?
Proportion of forms
Proportion in a composition refers to the relationship between one part of an object to another part of the same object. It can also be between one object and another. For example, when drawing a pot and a calabash, the calabash should not be too big in comparison to the pot. Proportion of forms is achieved when all the parts of a picture relate to one another in such a way that they are pleasant to look at. The composition below shows proportion of forms in a drawing.
- How has proportion been achieved in the composition?
- Why is proportion of forms important when drawing a composition?
Activity 6
Draw a calabash and a gourd. Consider the size and shape of the gourd in relation to the calabash. Ensure correct proportion of the forms you have drawn. Shade the composition using stippling technique.
Textural effect
Texture is the surface feel of an object. Objects around us have different textures. You can experience this by feeling various objects around you with your palm. Some textures are rough, smooth, slippery, coarse, prickly and spongy. When using the stippling technique, you can create various textural effects by varying the size and number of the dots.
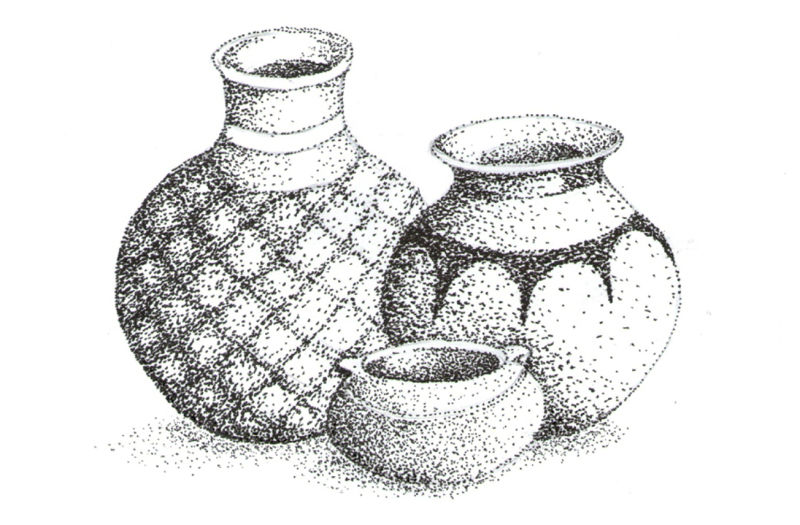
Examine the textures in the drawing shown below.
- What type of texture can you identify in the composition?
- How were the textural effects created?
- Stippling
- Smudging
- Cross hatching
Activity 7
Draw an imaginative composition comprising three gourds. Practise creating varying textural effects on the drawings using stippling technique. Vary the size and number of dots to create different textural effects in your composition.
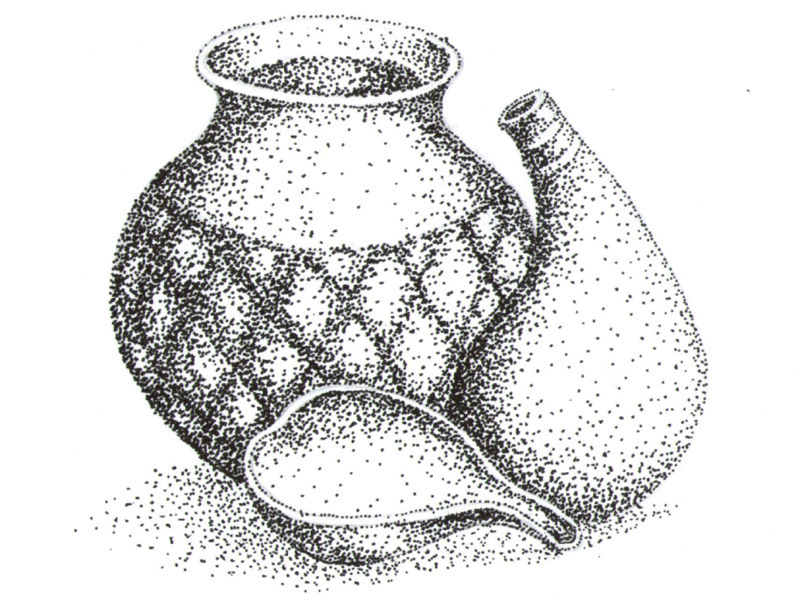
How to draw overlapped forms and shade using stippling technique
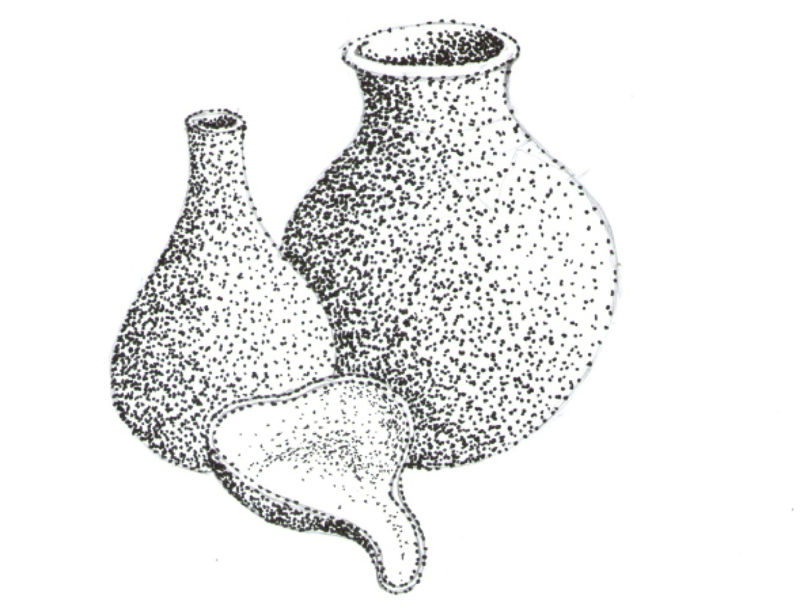
When creating a composition with more than one form, the forms may be drawn separately or overlapped. Overlapping of forms is achieved by placing some objects in front of others. The objects in front appear to partially cover the ones behind. When objects are overlapped in a drawing, the ones in front appear closer than the ones behind. Here is an example of a composition showing overlapped forms.

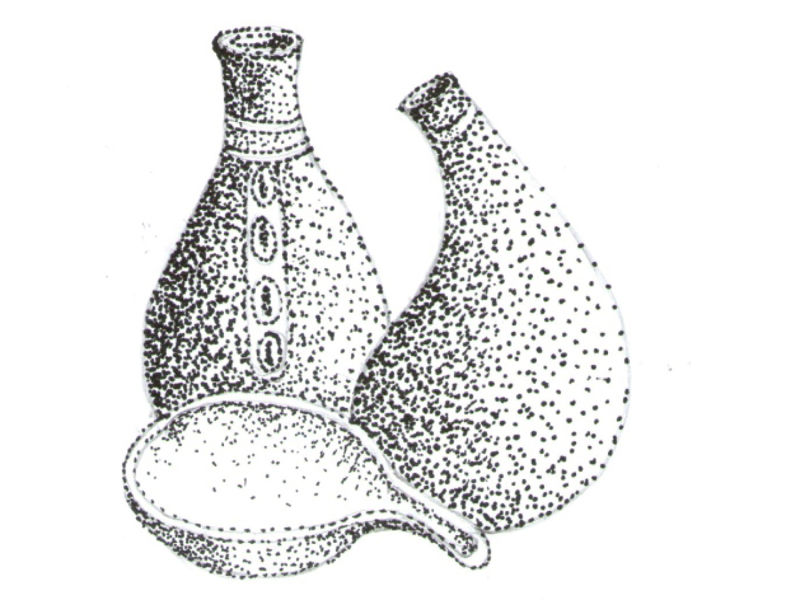
Drawings showing overlapped forms
Activity 8
Draw an imaginative composition comprising an overlapped pot, gourd and a calabash. Shade the composition using stippling technique. Follow the suggestions given below to draw the composition.
- Think of the types, shape and size of the pot, gourd and the calabash to draw.
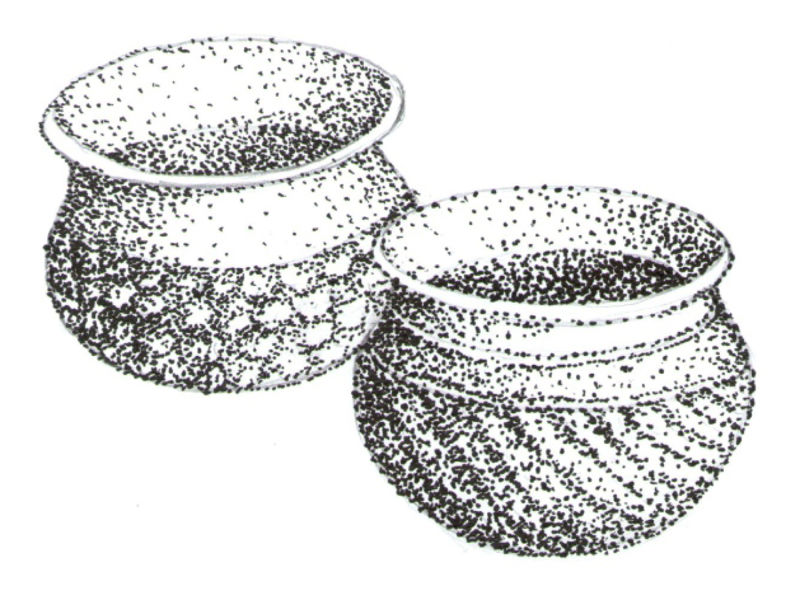
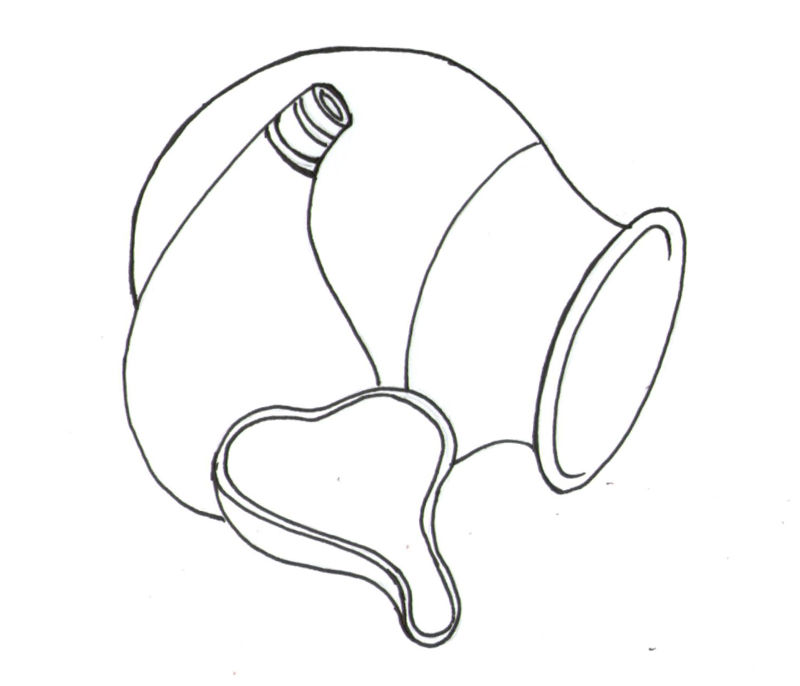
- Think of how to arrange them ensuring overlap, proportion and balance of forms. You can arrange the pots in different ways. Here are some examples of how to arrange the forms.
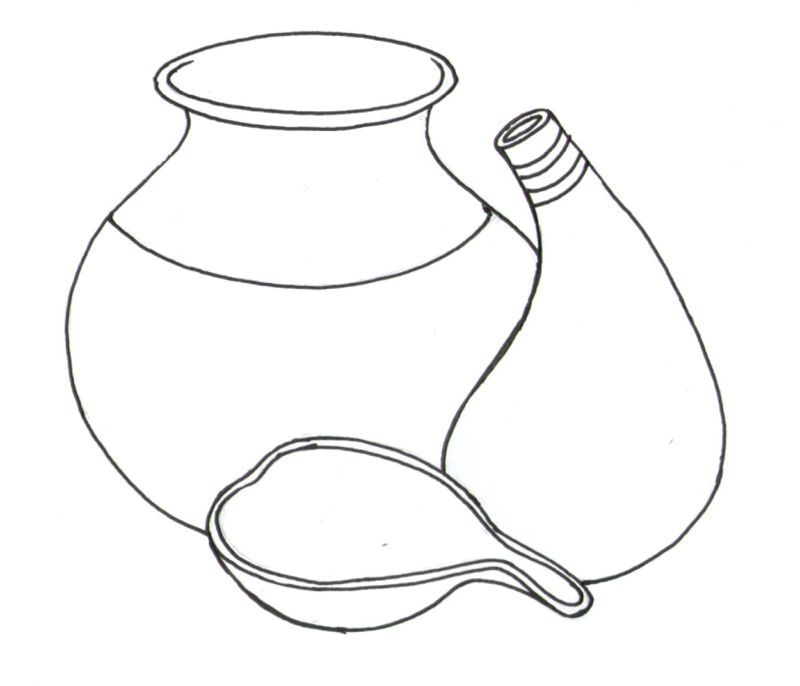
- Draw the outline of the forms then refine the drawing.
- Consider the effect of light on the objects then shade the composition using stippling technique.
- Create textural effect on the forms by varying the size and number of dots. Here is an example showing various textural effects on the forms.
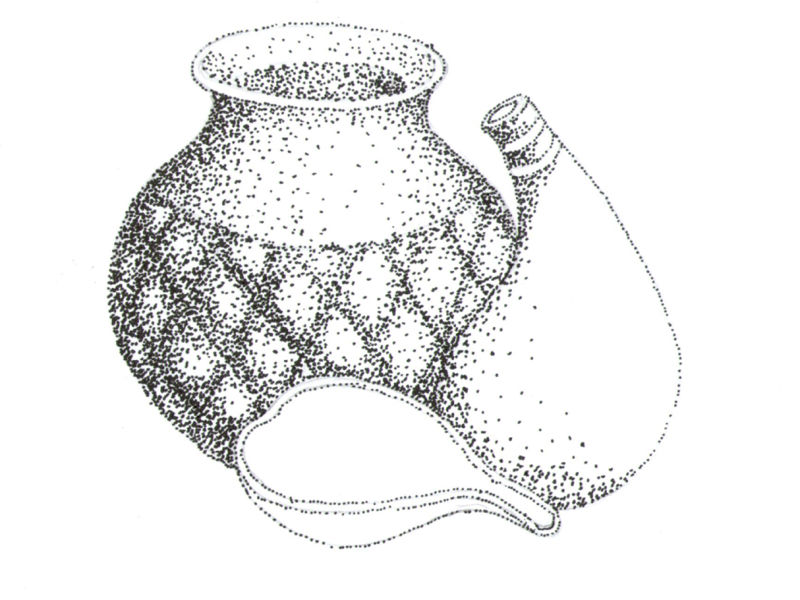
- Use stippling or smudge technique to shade lightly below the forms. Shading below the forms will give an impression that the objects are resting on a surface and are not floating in the air. A sample of the final work is shown below.
Activity 9
Display your drawings around the classroom. Take a gallery walk in groups and talk about own and others’ imaginative composition drawings.
Check for the following as you observe the drawings:
- Shading using the stippling technique.
- Overlap of forms.
- Proportion of forms.
- Balance of forms.
- Neatness of the drawing.
Extended Activities
When at home or in school, practise drawing various pictures and shade them using stippling technique. Show the pictures to your friends, siblings, parent or guardian.
Self and peer assessment
Find out if you and your friends are able to do the following:
- Draw imaginative compositions that are pleasant to look at.
- Create overlap of forms in a composition.
- Shade an imaginative composition using the stippling technique.
- Draw proportional forms.
- Create balance in a composition.
Community Service Learning
Draw imaginative compositions and shade them using the stippling technique. Display the drawings on the walls of the classroom and offices to make the places attractive and lively.